
Here is a tutorial that shows how to get a nice looking shadow behind the text, and a simple reflection below it. Albeit being a very simple tutorial, this skill can be applied to many advanced techniques for a very impressive outcome. Apple is notorious for their reflections on pretty much everything, but it's no secret how they do it!
If you have any questions on how to do something, a suggestion, or a general comment, don't hesitate to post in the comments section or contact me directly.
View the tutorial after the jump!
1) Create a new document and call it whatever you want. Set the dimensions to the 656px wide, and 265px height. Make sure the Background type is set to "white."
2) Create some text that preferably doesn't have a descender below the baseline like "MacBook Pro." It can be done just as well with something like "Money Boy" with the "y" characters going below but some extra steps would be required. Here's what I have so far:
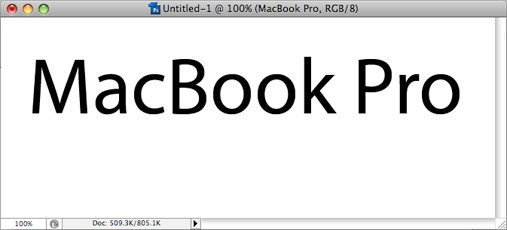
3) Duplicate the "MacBook Pro" layer and rename the bottom layer to "shadow" + hide the top text later so we're only looking at the shadow layer.
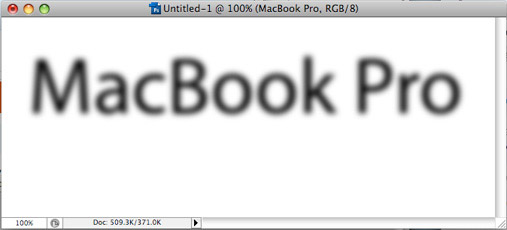
4) In order to make this look like a shadow, we have to add a blur to the text. FIRST: Have the "shadow" layer selected and go in the menu go to LAYER > RASTERIZE... > TYPE. After this, go to FILTER > BLUR > GAUSSIAN BLUR... and set the Radius to 4.0 pixels. This will make it soft enough to replicate a shadow. You should have something like this:
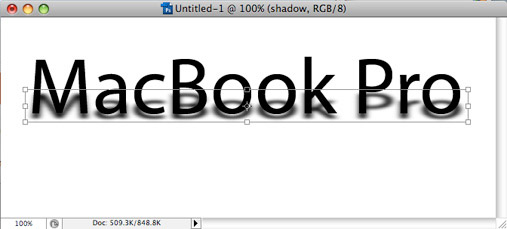
5) Now reveal the "MacBook Pro" layer so that it overlaps the shadow layer. With the "shadow" layer still selected, go to EDIT > TRANSFORM > SCALE. Now drag down and shrink from the top edge so you get something like this:
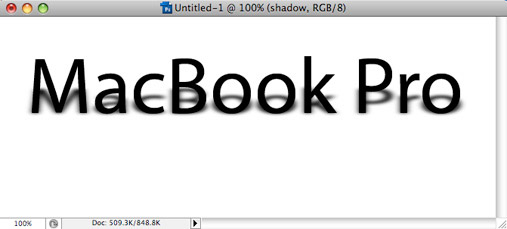
6) Nudge the shadow layer up by a few pixel to make it fit on the base of the MacBook Pro text, like this:
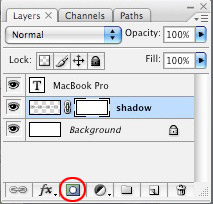
7) Now, on the shadow layer, we must add a layer mask by hitting the "vector mask" button like this:
8 ) Now, grab the Gradient tool (shortcut key: G) with the default colors going from black to white. Point your cursor on the top edge of the shadow, and slightly drag DOWNWARD. You should get a fading effect where the top is faded away. You might have to try this a few times until you get it right. You should have something like this:
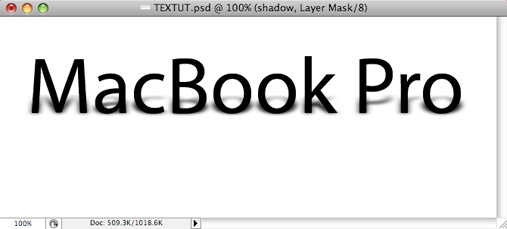
Note: Our shadow is pretty much done. Now we must create the soft reflection below the MacBook Pro text.
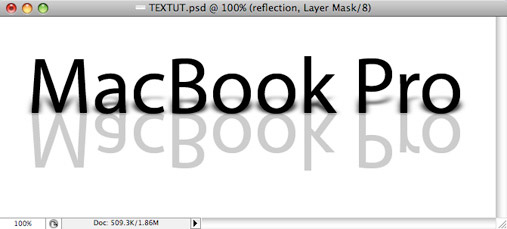
9) Now duplicate the MacBook Pro layer and rename the copy to "reflection." Now we must flip the text vertically: EDIT > TRANSFORM > FLIP VERTICAL. Now select the Move Tool (shortcut key: V) and use the arrow keys on your keyboard to nudge it below the MacBook Pro text. Set the Opacity of this layer to 20%. Your layers panel should look like this:
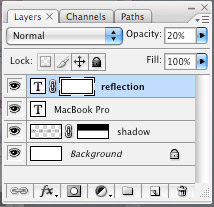
And your artwork should look like this (if doesn't, make sure you didn't skip a step):
10) Now add a layer mask to this layer just like we did in step 7. With the same Gradient Tool settings, this time drag UPWARD from the bottom of the layer to fade away the bottom edge. After a few tries, you should have something like this:
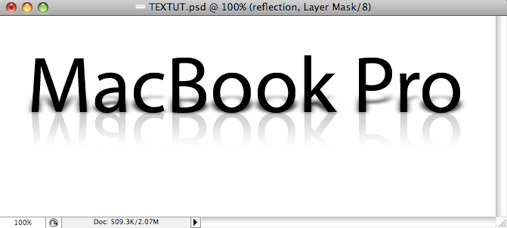
YOU'RE DONE!
This is pretty much as basic as it can get. With advanced knowledge of Photoshop's features and skills, you can modify all of the text and the layers to have something really cool like this:

If you would like to see a second part for this tutorial on how to achieve this final effect, please comment and let me know! I will be more than glad to put it together.
UPDATE: REFLETION & SHADOW WITH A DESCENDER
1) First, duplicate your text layer and flip it vertically so it looks like this:
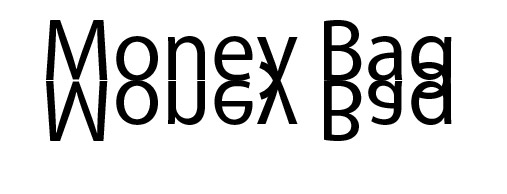
2) Rasterize the reflected text layer. Take the Rectangular Marquee tool (keyboard shortcut: M) and nudge the "y" and the "g" down so it looks something like this:
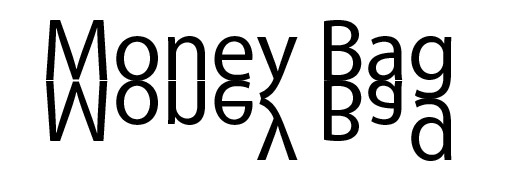
3) Now you can apply the layer mask on to it to make it look like a reflection. You can also apply the same effect for the shadow by repeating steps 1 through 8. You should have something like this after rasterizing the text reflection layer, and creating a shadow layer just like I did above. Note: You might have to play with the shadow a bit so that you get a desirable result. Here's how I did it

Note: Once the shadow the layer is properly aligned, you can use the smudge tool to shift the lower shadow regions of the "y" and "g." Remember, always make sure you're working on the right layer.
Hope you enjoyed this update! If there are any more requests, feel free to ask!
If you liked this tutorial, you might also like this one:


This is very nice. Easy enough to do.
Thanks
How much more work is there if your text has a descender like a "y" or "g". Can you post this?
Hey Alex, I can put something together by tonight and I'll update this post. Do you want to use this technique for something you're working on? =)
Alright, I have updated the tutorial on how to do the reflection and shadow with descending text. Enjoy!
Hallo, really good job. Keep watching to Lasha .. 🙂
Hallo again, this is my second post and i hope made it too like you Lasha ..
http://img221.imageshack.us/img221/3640/dcao6.jpg
Hey Davut, looks good! You should try making the shadow of the text less blurrier to give it some contrast. Also, play around with all the colors, too. =)
I'll be posting a bunch more tutorials very soon!
mmmmmmmm
Its really good exercise.but I couldn't use wrap text
Hash, the reason you couldn't use the Warp Text tool is because the text layer needs to be rasterized. Right click or Ctrl + click (mac) on the text layer and select the Rasterize option.
very nice effect i love it thanks for sharing
http://www.pakitreat.com
I like this tutorial very much . I have tried this & I have done it 85% accurate . thanks . Now I want to see the tutorial of final effect. please send me the tutorial of that effect.
This is very nice and easy to do. Thanks.
Excellent tutorial. Could you please also post the tutorial for the final/more advanced effect?
Thank you very much.
Alright, Alex. I'll work on the second part and post it as soon as possible. In the mean time, I just put up another tutorial you might like. How to create the Fox 5 News Logo
Great tutorial.
Nice to see two fades used togeather... Looks great!
hello, this is my first visit at ur blog. nice to noe u mate.
i would like to thanks to you for this helpful photoshop tutorial.
i will subscribe to ur blog rss feed. im newbie in photoshop.
cheers!
p/s: im from malaysia, did u noe where it is located? lol
I would like to know how you did that 2nd part please.
Very good!!
Very nice tutorial who to create fancy text shadow and reflection using Photoshop!
Regards!
This is awesome thanks a lot